Square Footage Calculator
- Last formula update:
Decimal & Rounding Policy
- Width, length, quantity, area, unit price, and total cost accept positive decimal values.
- Calculations use unrounded values based on Area = Width × Length × Quantity and Total Cost = Area × Unit Price.
- Area results display up to six significant digits, while large values may use fewer decimal places.
- Unit prices display up to seven significant digits, and total costs are rounded to two decimal places.
- Unit conversions are completed before rounding to reduce cumulative calculation errors.
- Minor differences may occur when displayed results are reused because hidden precision is preserved internally.
Valid range
- Width: Enter a positive value greater than 0 and no more than 1 × 10¹⁵.
- Length: Enter a positive value greater than 0 and no more than 1 × 10¹⁵.
- Quantity: Enter a positive whole or decimal value greater than 0 and no more than 1 × 10¹⁵.
- Area: Enter a positive value calculated using Area = Width × Length × Quantity.
- Unit price: Enter a positive cost per selected area unit, excluding zero and negative values.
- Total cost: Enter a positive value calculated using Total Cost = Area × Unit Price.
- Empty fields are treated as unknown variables, while invalid values are excluded from calculations.

Reviewers:
Davenya Quillford
Elvaron Kesthall
Check our editorial policy
August 19, 2026
1.0.0
Initial calculator and formula release.
Our engineers are here to help you get it right.
How Does the Square Footage Calculator Estimate Area and Material Cost?
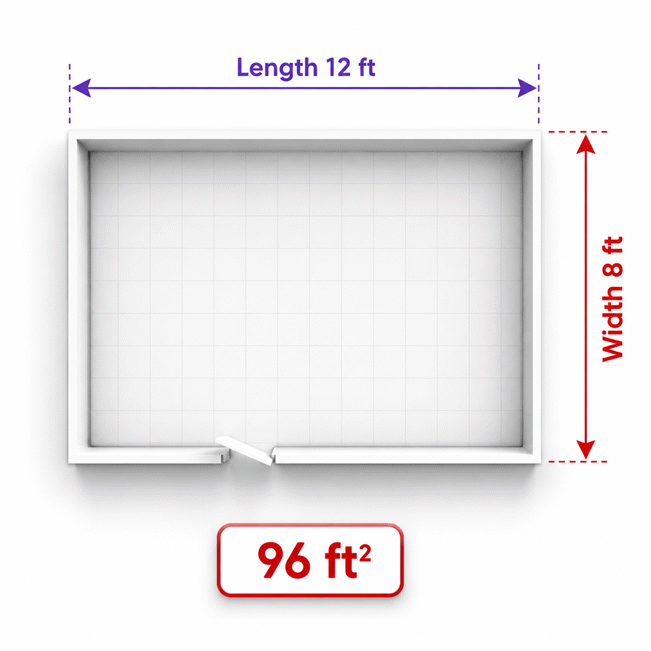
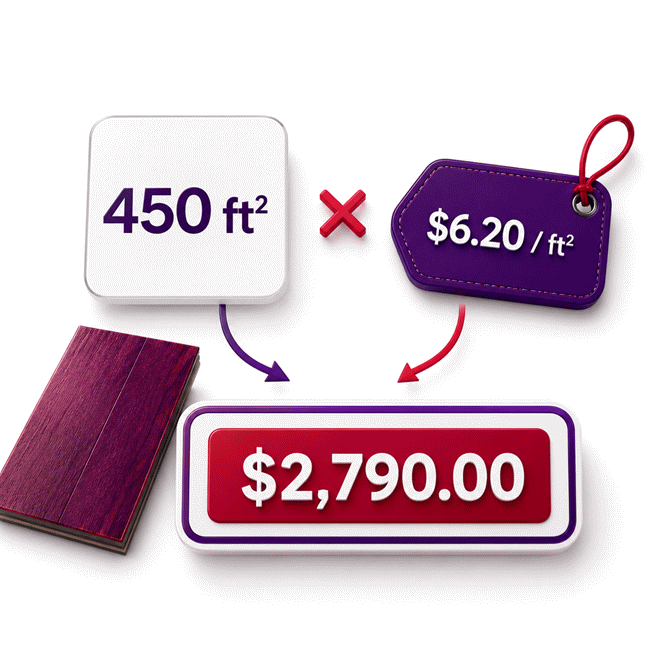
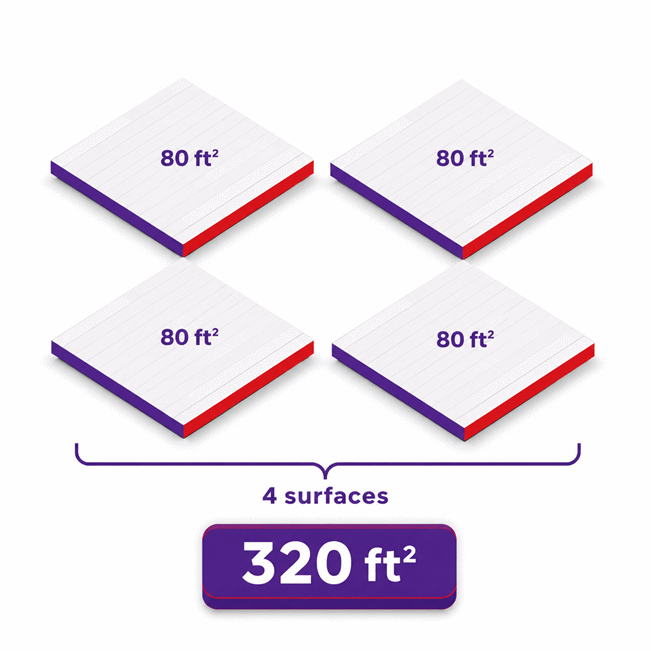
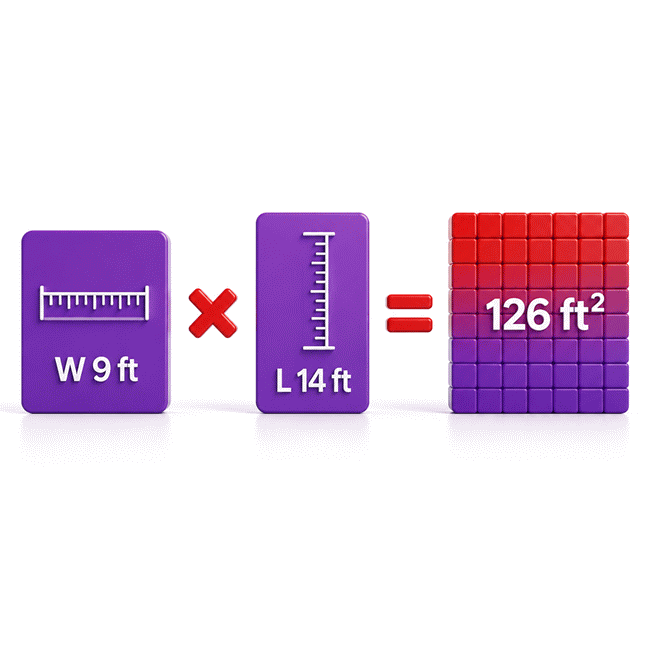
Square Footage Calculator results help you turn measured dimensions into a clear project estimate. Enter the width, length, and quantity of identical rectangular surfaces. The calculator determines their combined area using Area = Width × Length × Quantity. Add a unit price to estimate material cost using Total Cost = Area × Unit Price. Reverse solving can also find a missing dimension, quantity, area, unit price, or total cost when enough related values are known.
- Measure the exact surface receiving the planned material.
- Group surfaces only when their width and length are identical.
- Calculate different room sizes or sections separately.
- Check every measurement before requesting prices or ordering materials.
- Use the Square Footage Calculator to review direct and reverse estimates.
- Match the entered unit price with the selected area unit.
- Confirm package coverage before converting area into boxes, sheets, or rolls.
- Keep labor, taxes, delivery, preparation, and equipment costs separate.
- Review openings, permanent fixtures, and unusual edges before purchasing.
The result supports flooring, wall, ceiling, room, and repeated-surface planning. Accurate inputs improve purchasing decisions, supplier quotes, budget control, and project records. Always compare the calculated estimate with site conditions and product coverage information.
Assumptions used in this calculator
- All measured surfaces are assumed to be rectangular.
- Width and length measurements represent finished usable dimensions.
- Each repeated surface is assumed to have identical dimensions.
- Quantity must be a positive value representing equal-sized surfaces.
- Selected measurement units are assumed to match each entered value.
- Unit conversions use established mathematical conversion factors.
- Area is calculated using width, length, and quantity only.
- Unit price applies uniformly across the entire calculated area.
- Currency conversion rates may differ from current commercial rates.
- Material waste, cutting losses, and installation allowances are excluded.
- Labor, taxes, delivery, and equipment expenses are excluded.
- Input measurements and supplier prices are assumed accurate.
- Final industrial requirements should be verified by a qualified professional.
Results are rounded for display.
Internal calculations use full precision.
Formulas Used in Square Footage Calculator :
1. Total Area
2. Total Material Cost
Variable Definitions
- W is the width after conversion to the selected length unit.
- L is the length after conversion to the selected length unit.
- Q is the positive quantity of equal-sized rectangular areas.
- A is the combined area expressed in the selected square unit.
- P is the material price per selected square unit.
- C is the total material cost in the selected currency.
All unit and currency conversions are completed before calculation. Full internal precision is preserved for direct and reverse calculations, while displayed area values use significant-digit formatting and displayed total costs are rounded to two decimal places.
Variables & Definitions
View a complete list of all variables used in this calculator, including definitions and units
Square Footage Calculator Variables and Measurement Units
| Symbol | Variable | Description | Supported Units |
|---|---|---|---|
| W | Width | Width of one rectangular surface after unit conversion | cm, m, in, ft, yd |
| L | Length | Length of one rectangular surface after unit conversion | cm, m, in, ft, yd |
| Q | Quantity | Number of equal-sized rectangular surfaces | Unitless |
| A | Total area | Combined area calculated as W × L × Q | cm², m², in², ft², yd² |
| P | Unit price | Material price per selected square unit | Currency per m², ft², or yd² |
| C | Total cost | Estimated material cost calculated as A × P | Selected currency |
Unit Conversion Table
Length Unit Conversion Table
| Unit Group | Unit Name | Symbol | Equivalent in Meters | Used For |
|---|---|---|---|---|
| Metric Length | Centimeter | cm | 0.01 m | Width and length |
| Metric Length | Meter | m | 1 m | Width and length |
| Imperial Length | Inch | in | 0.0254 m | Width and length |
| Imperial Length | Foot | ft | 0.3048 m | Width and length |
| Imperial Length | Yard | yd | 0.9144 m | Width and length |
Area Unit Conversion Table
| Unit Group | Unit Name | Symbol | Equivalent in Square Meters | Used For |
|---|---|---|---|---|
| Metric Area | Square Centimeter | cm² | 0.0001 m² | Total area |
| Metric Area | Square Meter | m² | 1 m² | Total area and unit price |
| Imperial Area | Square Inch | in² | 0.00064516 m² | Total area |
| Imperial Area | Square Foot | ft² | 0.09290304 m² | Total area and unit price |
| Imperial Area | Square Yard | yd² | 0.83612736 m² | Total area and unit price |
Example Calculation
A = W × L × Q
A = 13.5 ft × 8.75 ft × 4
A = 472.5 ft²
C = A × P
C = 472.5 ft² × $6.40 per ft²
C = $3,024.00
Four identical surfaces each measure 13.5 feet by 8.75 feet. Their combined area is 472.5 square feet. Applying a material price of $6.40 per square foot produces an estimated total cost of $3,024.00. Waste, labor, taxes, and delivery charges are not included.
A = C ÷ P
A = $2,754.00 ÷ $5.10 per ft²
A = 540 ft²
W = A ÷ (L × Q)
W = 540 ft² ÷ (12 ft × 3)
W = 15 ft
The known total cost and unit price first determine a 540-square-foot area. That area is shared equally across three identical surfaces. With each surface measuring 12 feet long, reverse solving produces a width of 15 feet. The result assumes consistent dimensions and a uniform price across the entire area.
Results are rounded for display.
Internal calculations use full precision.
Calculations Disclaimer
How Much Space Do You Really Have?
A wrong area estimate can waste money before work even begins. The Square Footage Calculator helps you measure rectangular spaces with less effort. Enter the width, length, and number of matching surfaces. The Square Footage Calculator then shows the combined area immediately. You can also enter a material price for a quick cost estimate. This simple process replaces repeated manual calculations. It also reduces mistakes when several identical rooms or surfaces are involved.
The tool suits homeowners, installers, estimators, landlords, and construction teams. It works well for floors, walls, ceilings, rooms, and other rectangular areas. You can review each input before making a purchase decision. This gives you more control over quantities and budgets. It also helps you discuss requirements with suppliers more clearly.
A useful area result begins with careful measurement. Never rely on room names or estimated dimensions. Two rooms called “standard bedrooms” may have very different areas. Measure the actual surface that will receive the material. Include every relevant section and record each value immediately.
Measure first. Check twice. Calculate once. Purchase with greater confidence.
The displayed result is a planning value, not a physical survey. Site conditions can change the final material requirement. Corners, permanent fixtures, installation direction, and surface damage may affect purchasing decisions. Treat the calculator as the reliable center of a wider planning process.
Why Small Measurement Errors Become Expensive
A small mistake may appear harmless in one room. The same mistake becomes larger across repeated spaces. It can affect material orders, labor schedules, delivery planning, and project budgets. Underestimating area may stop work before completion. Overestimating area may leave costly unused material.
Measure along the actual surface whenever possible. Keep the measuring tool straight and level. Do not measure across furniture or stored materials. Check whether walls remain parallel across the full room. Older buildings often contain small changes that are easy to miss.
Record measurements with clear labels. Avoid keeping several values only in memory. Write the room name beside each measurement. Mark repeated surfaces separately when their dimensions differ. This habit prevents values from being assigned to the wrong location.
How the Calculator Turns Measurements into a Useful Result
A project manager often knows the dimensions but still lacks a reliable total. The calculator connects those measurements with quantity and cost. Width and length describe one rectangular surface. Quantity represents how many matching surfaces share those dimensions. The resulting area represents all included surfaces together.
This structure is especially useful for repeated rooms, panels, walls, or floor sections. You enter one set of dimensions instead of repeating the same work. The quantity field then extends that measurement across every matching surface. This saves time and keeps related values together.
The area field can also support reverse problem solving. You may already know the total area but lack one dimension. When enough related information exists, the missing value can be determined. This is helpful during plan reviews, supplier discussions, and estimate checks.
Cost planning follows the same connected approach. The area and unit price create a total material estimate. A known total cost can also help reveal the implied unit price. These relationships allow the tool to support both forward and reverse planning.
Measurements → Surface area → Repeated quantity → Material estimate → Purchase decision
Using Quantity for Matching Surfaces
Repeated areas often create hidden calculation work. A hotel corridor may contain matching wall panels. An office may include several rooms with equal dimensions. A workshop may use identical floor zones around several machines.
Quantity prevents unnecessary duplicate entries for these matching surfaces. It should only group areas with the same width and length. Different surfaces should be calculated separately. Their results can then support a wider project total.
Do not use quantity to combine unrelated room sizes. That shortcut creates a misleading result. Grouping works only when every included surface truly matches. Check drawings and field measurements before treating spaces as identical.
When Separate Calculations Are Safer
A surface may look rectangular while hiding a recess or fixed obstruction. Another room may taper slightly near one wall. These conditions make a single measurement less dependable. Separate the project into simple rectangular sections whenever dimensions change.
Calculate each section independently. This makes every measurement easier to verify. It also shows where an error entered the estimate. A clear section list is easier to share with installers and suppliers.
Separate calculations also help during later design changes. One section can change without rebuilding the entire estimate. This improves traceability and reduces rushed corrections before ordering.
How to Measure Width and Length Without Costly Mistakes
An empty-looking room can still produce a poor estimate. Skirting, cabinets, recesses, and uneven walls may affect usable coverage. Begin by identifying the exact surface that needs material. Floor measurements should follow the floor. Wall measurements should follow the wall surface.
Measure the longest relevant direction first. Record that value as the length. Measure the perpendicular direction next and record the width. The labels remain flexible, but each direction must be measured correctly.
For large areas, measure more than one point. Compare opposite sides when the building is old or irregular. A narrow difference may matter across expensive flooring or wall finishes. Use the measurement that matches the actual installation plan.
Digital tools can speed up fieldwork. A tape measure remains useful for confirming corners and short distances. Laser devices may help across clear, open rooms. Both methods still require careful placement and a second check.
Measuring Floors, Walls, and Ceilings
A flooring buyer needs the surface beneath the planned finish. Permanent cabinets may change what will actually receive flooring. Discuss those areas with the installer before excluding them. Future cabinet changes may make full-floor coverage more practical.
Wall planning requires each wall’s visible working surface. Doors and windows may reduce coverage for some materials. Small openings may not justify detailed deductions. Large openings can noticeably change material demand.
Ceiling measurements often match floor dimensions in simple rectangular rooms. Sloped or stepped ceilings need separate sections. Never assume the ceiling matches the floor without checking the layout.
The safest measurement follows the surface, not the room’s advertised size.
Preparing a Measurement Record
Create a short record before entering any values. Include the room name, surface type, width, length, and quantity. Add a note for openings, obstacles, or unusual edges. This record becomes useful during purchasing and installation.
Photographs can support the written record. Capture corners and features that may change coverage. Keep the measuring tool visible when useful. A supplier can understand a clear record faster than a rough verbal estimate.
Save the final calculation with the project documents. The result should remain connected to its original measurements. This prevents future confusion when prices or materials change.
Reverse Solving When One Value Is Missing
Sometimes a plan lists area but omits one side. This missing detail can delay pricing and material checks. Reverse solving uses the known values to determine the unknown input. The calculator performs this task when enough dependable information is available.
You might know the area, width, and quantity. The missing length can then be found. You might instead know the area, length, and quantity. The missing width can be determined through the same relationship.
Quantity can also be investigated when area and dimensions are known. This can help review repeated spaces shown on a plan. However, the result should match the real project layout. A mathematical quantity does not prove that every surface exists.
Reverse solving also helps check commercial estimates. A supplier may provide total cost and area. These values can reveal the effective price for each area unit. You can then compare that rate with the quoted product price.
Why Reverse Results Need Context
One known area does not always define a unique room. Many width and length combinations can produce the same area. Reverse solving needs enough additional information to isolate one missing value. Without that information, several answers may remain possible.
A calculated dimension should also make physical sense. Check it against drawings, site limits, and nearby structures. A mathematically valid result may still describe the wrong surface. Context protects the project from that mistake.
Review whether quantity represents complete surfaces or partial coverage. Construction work may include half walls, partial panels, or shared sections. The number entered must describe the actual scope.
Turning Area into a Practical Material Budget
A correct area does not automatically create a complete purchase order. Material packaging, cutting, breakage, and delivery rules still matter. The calculator provides the core area and estimated material cost. Purchasing decisions should add product-specific requirements afterward.
Start with the calculated area. Then review how the chosen material is sold. Flooring may arrive in sealed boxes. Tile may be sold by box or piece. Fabric and carpet may follow fixed roll widths. Panels may cover a stated surface per sheet.
The listed unit price must match the priced coverage. A box price is not automatically a price for one square unit. Divide packaging information carefully before comparing products. Suppliers should provide clear coverage details for every package.
The total cost estimate focuses on area-based material pricing. It may not include labor, preparation, tools, fasteners, delivery, taxes, or disposal. Keep these budget groups separate. This makes quotes easier to compare and update.
Base area → Product coverage → Purchase quantity → Added project costs → Final budget
Comparing Material Offers Fairly
A low package price can hide poor coverage. A higher-priced package may cover much more area. Compare offers using the same coverage basis. This reveals which option delivers better material value.
Also compare product grade, thickness, finish, and installation needs. Two products with similar prices may perform differently. The cheapest surface material may require more preparation or specialist labor.
Ask whether all boxes come from a matching production batch. Color and texture can vary between batches. Ordering enough material at once may reduce visible differences. Keep spare matching pieces for later repairs.
Price alone is weak. Coverage, quality, and installation needs reveal real value.
A Better Buying Workflow
Complete measurements before requesting prices. Send suppliers the same project information. Request material coverage, package quantity, delivery cost, and return conditions. Compare each offer using the same scope.
Confirm stock before approving the project schedule. A displayed price does not guarantee immediate availability. Ask whether every required package can ship together. Split deliveries may increase cost and delay installation.
Save the selected offer beside the area calculation. This creates a simple purchase trail. It also supports later checks when invoices arrive.
Common Square Footage Mistakes That Disrupt Projects
Many costly errors begin before the calculator is opened. Users may estimate dimensions, mix unrelated surfaces, or forget repeated rooms. Others enter package prices as area prices. These mistakes can create believable but incorrect results.
Another common mistake involves measuring the wrong surface. Floor area cannot replace total wall coverage. Wall coverage cannot replace ceiling area. Each project requires measurements from the surface receiving the material.
Users sometimes group rooms because they appear similar. Small dimension differences can change the combined result. Measure every room before assigning a shared quantity. Visual similarity is not reliable evidence.
Openings also cause confusion. Flooring normally covers the floor beneath an open doorway. Wall finishes may not cover the door itself. Decide what receives material before making any deduction.
How to Catch Errors Before Purchasing
Review the measurement record beside the calculator. Confirm that every value belongs to the correct surface. Check repeated quantities against the plan. Compare the final area with the project’s visible scale.
Use a second method for important orders. Recalculate sections independently or ask another person to review them. A short review may prevent expensive returns and schedule delays.
Watch for results that feel unexpectedly large or small. Surprise can signal a real design issue. It can also reveal a misplaced decimal or incorrect quantity. Investigate the cause before accepting the result.
Keep calculation and purchasing responsibilities clear. The calculator processes entered values. The user remains responsible for measurement quality and project scope. The supplier confirms product coverage and package requirements.
Building a Reliable Workflow with AxiCalculator
A rushed estimate creates anxiety because every later decision depends on it. AxiCalculator gives the project a clearer starting point. It connects measurements, repeated areas, and cost information in one workflow. Results update as the known values change.
The interface supports direct and reverse planning. This makes it useful during measurement, budgeting, and quote review. Results can also be saved or shared with project records. Clear records reduce repeated work across the project team.
Use the calculator before contacting suppliers. Arrive with measured dimensions and a verified area. Ask sellers to confirm package coverage and additional project items. This creates a more useful conversation and a stronger quotation.
Return to the calculation when the design changes. Update only the affected measurements or prices. Keep older project records when a decision needs comparison. This supports transparent planning from early estimates through purchasing.
From First Measurement to Final Decision
Begin with the real surface. Record every relevant dimension. Separate different sections and group only matching surfaces. Enter the values carefully and review the result.
Next, connect the area with the selected material price. Compare offers using equivalent coverage. Add packaging, preparation, delivery, and installation costs outside the basic material estimate.
Finally, verify the order with the installer or supplier. Confirm product coverage and available stock. Save the calculation beside the approved quotation. You now have a clearer path from measurement to purchase.
A reliable estimate does more than produce a number. It reduces uncertainty during a costly decision. It gives buyers, installers, and suppliers a shared reference. Most importantly, it helps prevent avoidable surprises after work begins.
Frequently Asked Questions
p23
p23
p23
p23
p23
p23
p23
Our engineers are here to help you get it right.